Jim's home | Trimaran home | Best Guess home
Retrofit 2012-2013
Antifouling Paint for the Hulls
Ama Planes
Daggerboard and Rudder Repair
Leaky Hatches
Built-in Cooler
Anti-Splash Flaps
Fun Stickers
Improved Rigging and Amenities
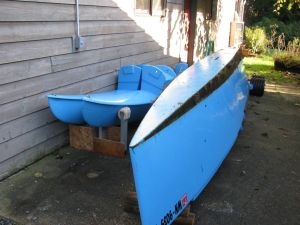
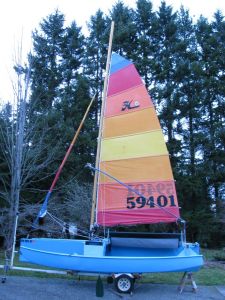
The time eventually came to launch Best Guess. I practiced assembling it on the trailer at my house so there'd be no big surprises at the boat launch ramp. It was a little nerve wracking, but things worked out fine.
Paul and I were sailing along at a good clip near the Poulsbo Yacht club once and passed a woman in a small boat. Whe we passed she said "Pretty good guess." I'm assuming this was in response to her seeing the boat name on the transom. Well, despite it indeed being a pretty good guess, and being a successful design on most counts, some modifications proved to be in order. So we pulled the boat out using the downtown Poulsbo ramp, and I came up with these modifications to be done:
Antifouling Paint for the Hulls - Back to top
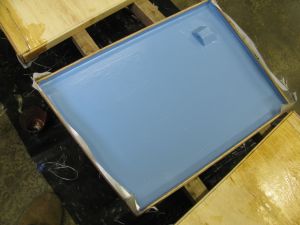
Any boat sitting in salt water without antifouling paint on the hull will get covered in horrendous marine growth in about 5 minutes. Well, actually about 2 weeks. This boat was built to be a trailered boat, so I didn't apply antifouling paint below the water line when I built it. Heck, I didn't even know where the waterline would be. Well, after mooring it in Liberty Bay in Poulsbo for the summer I sure knew where the water line was. Applying antifouling paint during the winter haul-out was a top priority. I bought most of a quart of West Marine brand paint from a guy on Craigslist. The fumes are amazingly toxic. I truly don't understand why the EPA doesn't outlaw this stuff, or what people would do if the they did.
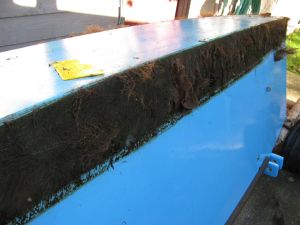
This is what a boat hull looks like after a few weeks of being in Puget Sound with no antifouling paint on the bottom. Note that the bottom had been scraped before these pictures were taken. I cleaned the hull numerous times during the summer it was moored at Pousbo marina, but it was a losing battle. The barnacles and chitons got harder and harder to remove, and the green fuzzies grew back with a vengance.
Interestingly the fuzzies grew on the sides way more than the bottom. I suppose this is due to the availability of sunlight.
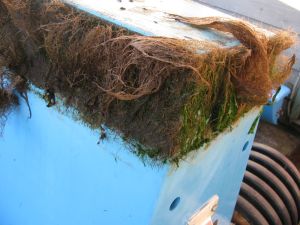
A close up of the fuzzies. They definitely slow the boat down.
The center hull being rotate back to right-side-up after being painted below the waterline with antifouling paint. Note the amas with their antifouling paint too to the right.
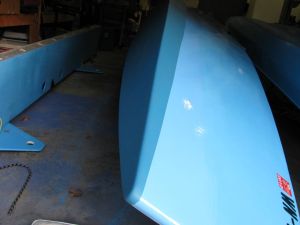
A close up of the bow's antifouling paint.
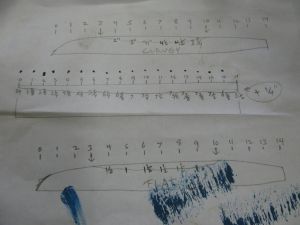
My diagram I used to mark and mask off hull before painting. I took measurements from the bottom every foot for the length of the hull, then masked with tape and paper.
Ama Planes - Back to top
The last sail of the season before pulling the boat out, we sailed in some pretty heavy wind. I'd say it was gusting up to 25 mph on the last reach or so. The amas were tending to get submerged due to extreme heeling. Part of this may have been due to the heavy growth of marine life on the hull surface, which would limit the wind being converted into forward motion instead of a heeling motion. And there was the time when Paul, his wife Val, my wife Deb and I were all on board trying to snack on appetizers and sip wine while sailing through moored boats in Liberty bay in 15+ mph of wind. I had the main cleated (a mistake) and little room to maneuver while threading the needle between 2 moored boats. A gust hit and the boat tipped WAY over. We came a hair's width away from capsizing. Val threw her wine up in the air, Deb lunged to windward. Everybody was yelling. Val got soaked, but I did round up in time, but we realized this thing could capsize.
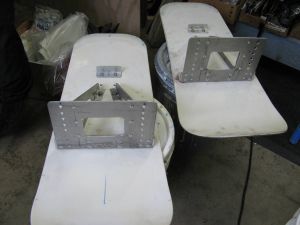
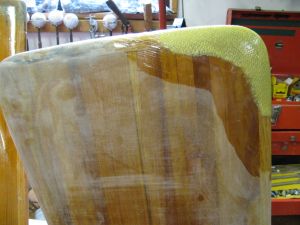
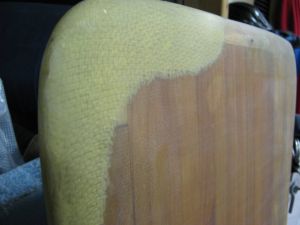
So, I pondered various solutions to increased stability. Extending the aka length (the ladder crossbar), slicing a windsurfer lengthwise and laminating the halves to the amas for more floatation, foils, and then planing devices for the amas. I bought a used snowboard, cut it in half, shaped the rear ends and laminated the exposed wood core with epoxy and glass, and will attach these to brackets on the amas to act like a water ski when the hulls get submerged. The idea is that they won't touch the water until the hulls are mostly submerged, so they won't induce drag until they're needed.
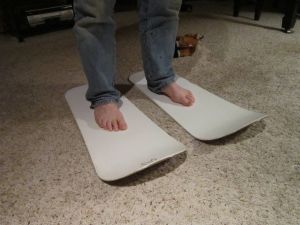
Me standing on the cut in half snowboard.
Wonder how they'd do on the slopes?
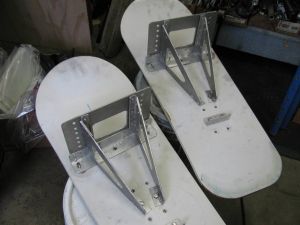
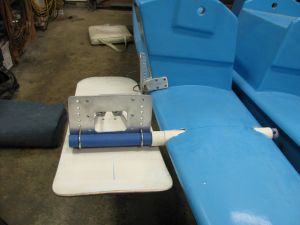
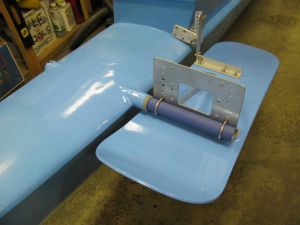
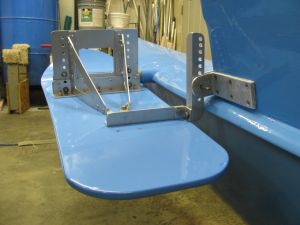
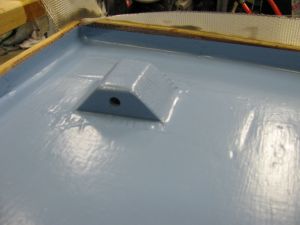
Planes with elaborate aluminum brackets attached to facilitate mounting on the amas. The height and pitch will be adjustable.
Shown from the front, where the pole from the amas will be mounted with u-bolts in the vertically oriented series of holes.
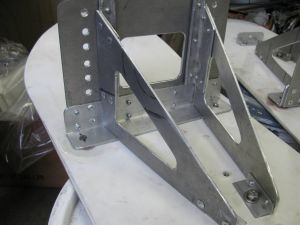
A close up of the brackets. There are many 3/16" pop rivets here. I drilled oversized holes in the snowboard for mounting the front of the brackets. Filled the holes with thickened epoxy, then laminated glass on the top. Will use flat heat stainless steel screws from the bottom so the fasteners will be flush and smooth with the bottom for low drag. The tail ends are bolted to the snowboard binding holes.
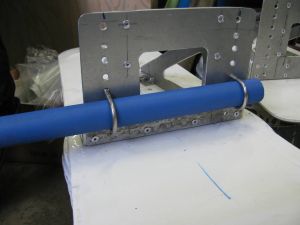
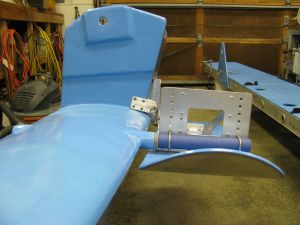
Shown with the tube in place with u-bolts that will connect it to the ama. That tube is from an old Mistral windsurfing boom.
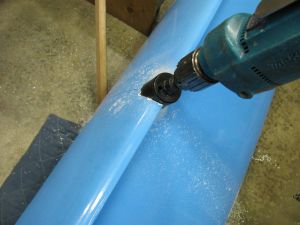
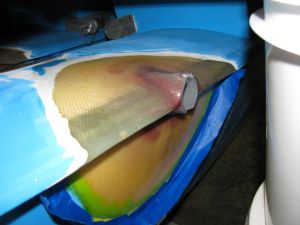
Drilling the hole for the piece of conduit that will be laminated into the ama.
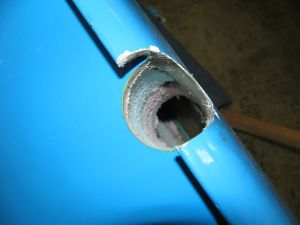
The hole successfully drilled.
One of the ama planes installed into a piece of PVC tubing put into the newly drilled hole.
Another view.
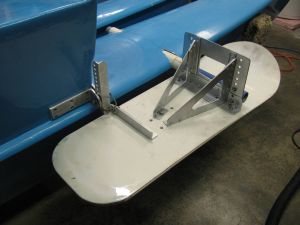
View from behind with a better look at the brackets. The rear bracket has holes drilled for a pin that lets you adjust the angle of attack.
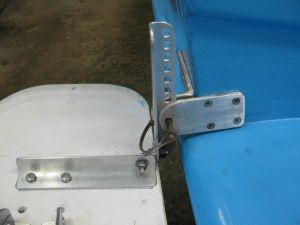
A close up of the rear bracket.
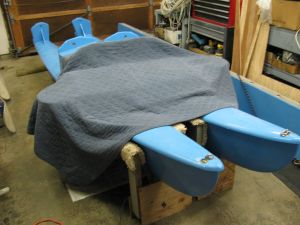
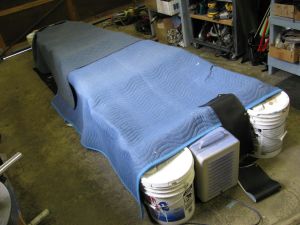
My friend Dave Sutter told me about "tenting" to make epoxy cure faster in a cold shop. Just drape a blanket over the area that's curing and point the heater under there. Works great! Lets see what's in the oven.
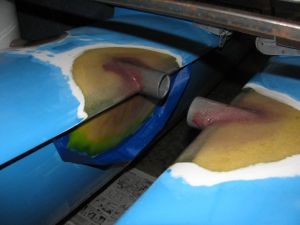
The conduit tubes laminated into the holes drilled with the hole saw. The reddish stuff is thickened epoxy. There are 3 or more layers of glass all around this joint, wrapped tightly up under the curled edge of the ama. The white stuff on the ama under the blue paint is gel coat. You need to sand down to the fiberglass below to get a strong joint.
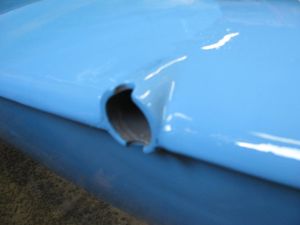
The outer edge. The tube is flush with the edge of the ama so nothing gets snagged when coming along side a dock.
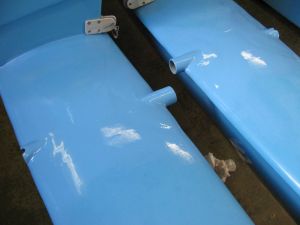
Amas with installed tubes painted with the first coat of Interlux Brightside medium blue.
Outer end (flush hull hull edge) of tube freshly painted.
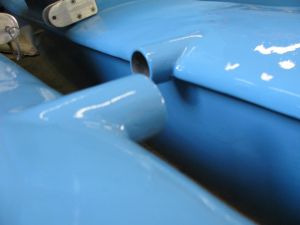
Inner tube ends (where the planes will be attached) freshly painted.

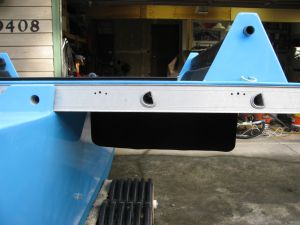
Ama planes with paint.
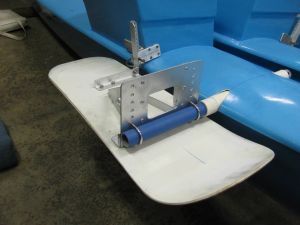
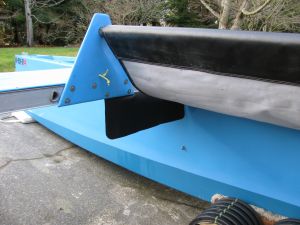
The finished product with 2 coats of paint, installed.
From the front.
From the back.
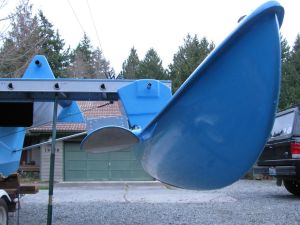
And installed on an ama with the boat set up.
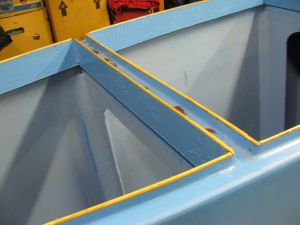
Daggerboard and Rudder Repair - Back to top
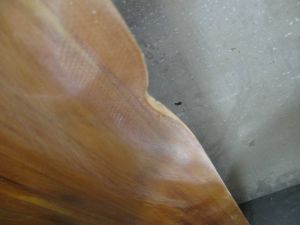
The daggerboard and rudder are made from strips of cedar epoxied together, with oak strips on the bottom and leading edge, all encapsulated in epoxy and fiberglass. When they scrape the rocky bottom, they wear. When you forget to pull the daggerboard up and sail right into the shore with 4 people and camping gear on a broad reach like we did at Tivoli Island, the daggerboard gets damaged. It actually held up really well for that impact. Regardless, some ding filling and new glass and epoxy was in order.

The bottom of the daggerboard with bare wood showing at the bottom leading edge (top left corner in photo).
The ding that occurred when we beached with the daggerboard down at Tivoli Island.
Ready for new glass on the rudder bottom.
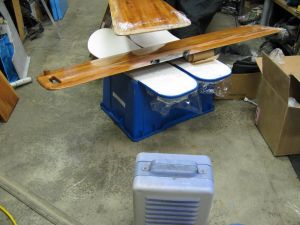
Various bits and pieces warming by the heater after being laminated with glass and epoxy.
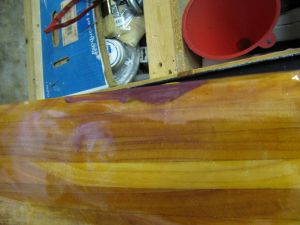
Thickened epoxy with two layers of glass over the big ding.
Kevlar laminated to the leading, bottom edge, for abrasion resistance. This stuff is weird to work with. It's a bitch to cut, and you can't sand it. It just frays when you do.
Daggerboard and rudder all done. Many layers of epoxy and glass at impact points. Kevlar at the nose of the rudder. The final wet sanding with 600 grit sandpaper made these super smooth. Should be really slippery through the water.
A close up of the kevlar on the rudder.
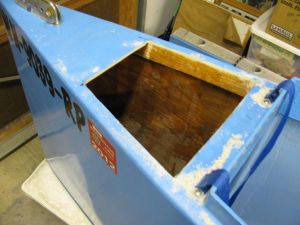
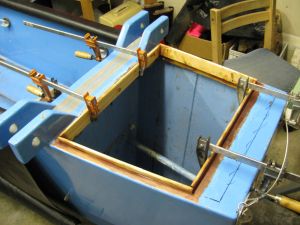
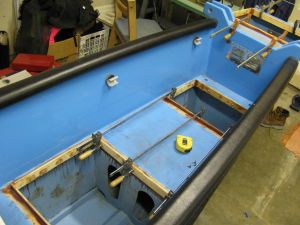
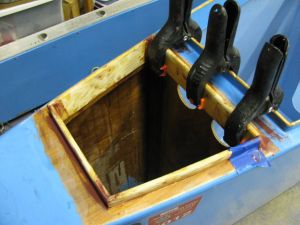
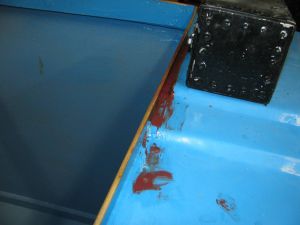
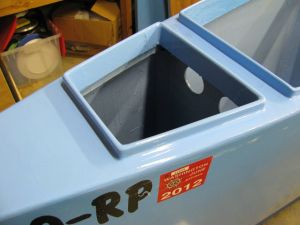
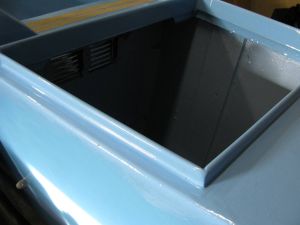
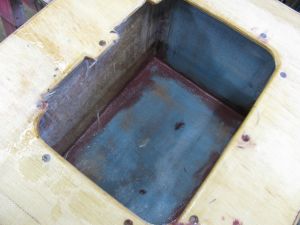
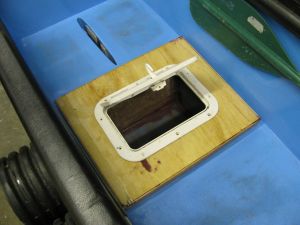
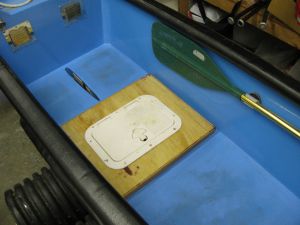
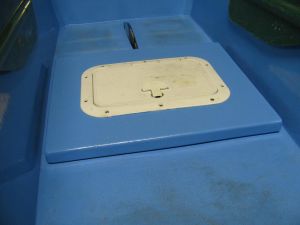
Leaky Hatches - Back to top
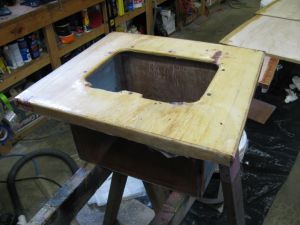
The compartment in the center hull where I built the hatch covers always remained bone dry. The other compartments where I used plastic screw-on deckplates with a rubber "o" ring gasket all leaked. Left out in the Northwest rain, the compartments would get inches of water in them. Not good for a plywood boat! I finally did some research on these deck plates and the consensus on forums is that they leak. I sure wish I would have known that before installing them. Anyway, I'm cutting them out and building hatch covers of my own with a raised lip on the deck like the 2 large forward hatches. This includes the deck plates in the footwell area of the cockpit. Will also replace the 2 large forward hatch covers with new, thicker ones that you can safely walk on, and that have texture applied.
Leaky deck plates removed from the rear and footwell compartments.
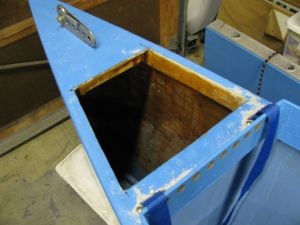
Leaky deck plate cut out of the bow compartment.
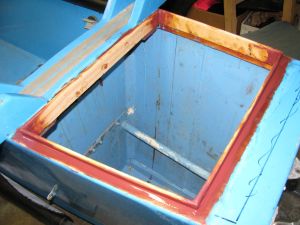
Epoxying on cedar strip to build lip around rear compartment opening after cutting out the leaky deck plate.
Cockpit hatch openings with strips of wood epoxied to the fore/aft edges, ready to epoxy on wood to serve as a raised lip around the edge.
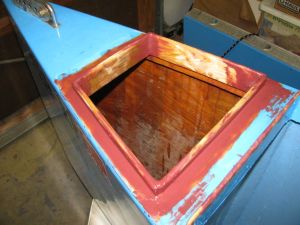
Forward hatch opening ready for raised lip around the edge.
Rear hatch with freshly epoxied raised lip around the edge.
Cockpit hatches with freshly epoxied raised lips around the edges.
Forward hatch with freshly epoxied raised lip around the edge.
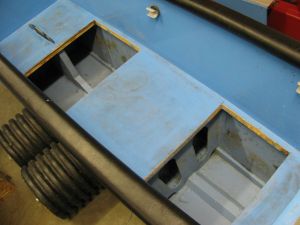
Large, previously installed hatch openings with their raised lips cut down to 3/4" high. The new hatch covers will sit lower on the deck.
I had to cut a groove at the front of the top layer of plywood below the mast base for the new, lower-sitting hatch.
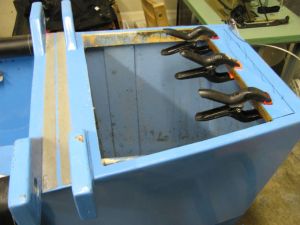
Rear hatch with thickened epoxy fillets around the edges.
Cockpit hatches with epoxy fillets around the edges.
Forward hatch with epoxy fillets around the edges.
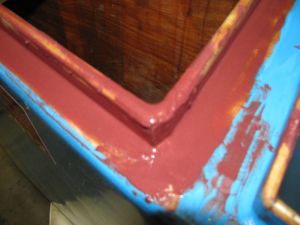
A close up of the fillets, plus very thickened epoxy at the corner.
Forward hatch with one coat of Interlux Brightside medium blue paint applied.
Middle hatches with one coat of paint.
Rear hatch with one coat.
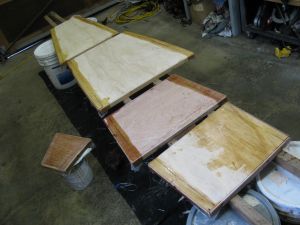
Here are the assembled hatch covers. The edges are made from thin, luan doorskin material. Four of them are meant to be walked on; the 2 at the bottom of the cockpit and the 2 big ones in front of the mast. They're made from 12mm Sande Ply plywood. I'd heard about this plywood. It's a cheaper alternative to various other marine grade plywoods such as Okume, and indeed it has no voids in the layers. One 4x8' sheet of 12mm (a.k.a. 1/2") at my local Home Depot was about $35. It was strong enough to walk on when I laid the cut out piece over the hatch opening. It'll be even stronger laminated with glass. The 2 darker colored hatch covers are the far forward and far aft ones, and use the thin, luan doorskin since they wont' be walked on.
The underside of a hatch cover with 2 coats of cheapo oil-based paint. No glass on the undersides except in the corners. Thickened epoxy was used for fillets where the sides joint the top.
This is the mounting point for a leash made from parachute cord. It's a block of cedar laminated on with fiberglass. I epoxied in a little piece of aluminum tent pole tubing in the hole for added strength.
Hatch covers under a blanket tent with final coat of epoxy on edges curing with heat.
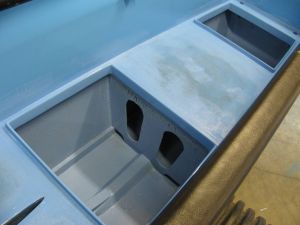
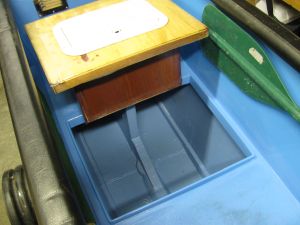
Built-in Cooler - Back to top
My friend Paul suggested I make a built-in cooler using the big rounded rectangle plastic hatch cover. I agreed, it would be "cool". It would also be about 20 hours of labor, but what the hey.
The built-in cooler to go in the cockpit floor. 2" rigid blue foam will be glued to the outside of it for insulation.
The inside of the cooler, all laminated with glass and epoxy, almost ready to paint.
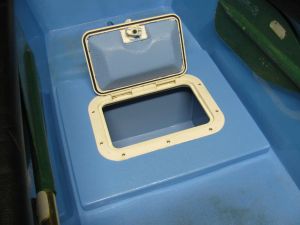
The cooler/hatch cover in place in the cockpit floor. It's big enough to fit bottles of wine laid down sideways, and standard micro-brew beer bottles standing up.
With the lid closed.
Cooler lifted out of the hatch opening. It'll be easy to dump ice and water out of it by just lifting it up and out of the boat.
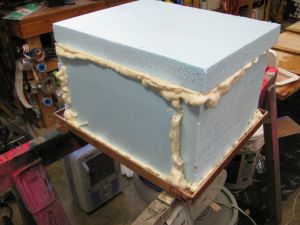
The cooler after glueing on 2" rigid foam (R5 per inch) with "Great Stuff" brand expanded foam sealant. I used 2 roof rack straps around the sides to hold the foam tightly against the plywood box, and put 2 concrete paving stones on top to hold the top foam piece down.
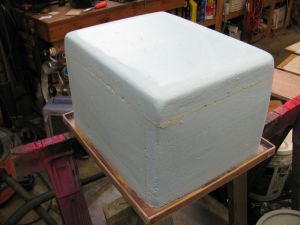
The foam box shaped with a SureForm, then sandpaper. I ended up using an orbital sander to take some foam off the sides so it would fit down into the hull without binding.
The foam box with the first coat of cheapo oil based paint.
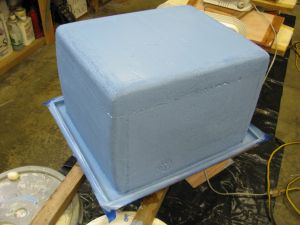
Completed cooler with door installed, door insulated, texture and paint applied, and set into place.
With door closed.
Anti-Splash Flaps - Back to top
Sometimes water splashes up under the aka and onto the vinyl seats. It's annoying and uncomfortable. So, I added some vinyl flaps to deflect the water spray. I suspect it'll work.
A view of the flaps from the backside of the seating. Probably could be trimmed smaller, we'll see.
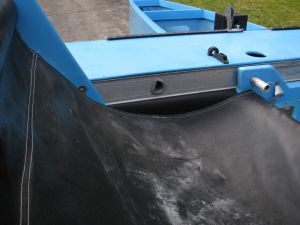
No more gap between the aka and the seat surface.
Viewed from the front.
Fun Stickers - Back to top
I wanted some "No Step" stickers to put on some areas of the boat, and I found some good ones at Red Rock Decals. They had a "Warning" sticker that you could put your own text in.
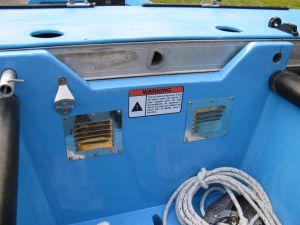
Note the orange, black and white sticker at the front of the cockpit.
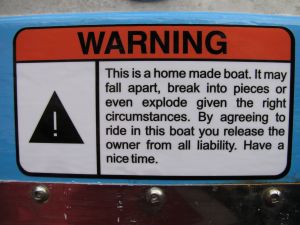
My warning text.

"No Step" sticker on the nose of an ama.
Improved Rigging and Amenities - Back to top
The rigging needed a few tweaks.
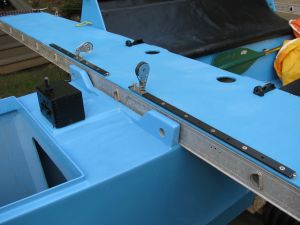
Tracks for sliding blocks to better trim the jib. Added guides and cleats for the jib sheet too. These replace the self-tacking jib where a pole was mounted on the bottom of the jib, and the single sheet was routed through a hole at the mast base. The jib clew went up in the air when running with the wind with that arrangement. Hopefully the jib will have a better shape with the sliding blocks.
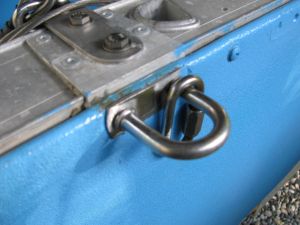
The hardware store U-bolts used as connectors for the mast shrouds on the aka have been replaced with actual marine bow eyes. Much stronger.
I replaced the main sail outhaul at the clew. The rope on the old one always jumped the pulley and jammed. This one is much higher quality and has a cast aluminum hook that won't unintentionally come out of the grommet in the sail clew.

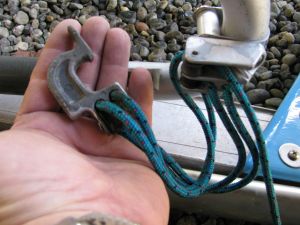
The pulley near the top of the mast for the jib halyard got replaced with a smaller one, more suited to the size of the line used for the halyard. One less shackle was needed too. I'm holding the old pulley in my hand in this pictures. The white rope in the picture is the new jib halyard.
The white rope is the new jib halyard. I replaced the old hardware store rope with actual marine-purpose 1/4" halyard/running rigging rope. Should be less stretch.

Some jib battens had torn through their sleeves in the jib. I added 3 patches of sail tape on each side of each jib end for each batten.
The bottom of the jib used to get some puckers in it, especially during high winds. I added a couple more jib hanks in that area. They clip the jib to the forward mast shroud. With this and the new jib halyard that has less stretch, the jib should have a better shape.
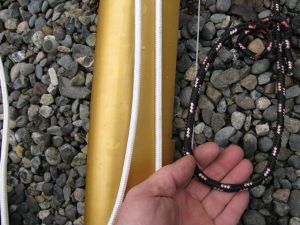
New tell tales on the mast shrouds. I tried yarn before, but the yarn always tangled or stuck to the shrouds. We'll see how surveyor's tape does.
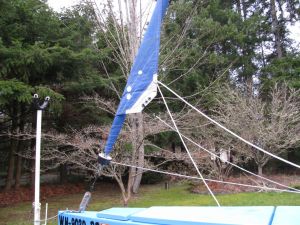
Change of plans with the jib. I bought a nice little roller furler from Longshore Marine in Poulsbo. It works great. Had to take the battens out of the jib though. We'll see what shape it gets without them.
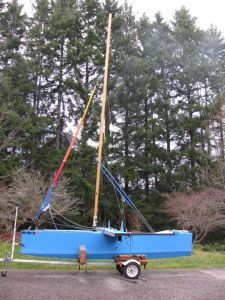
A full view of the furled jib. This required making a cable with thimbles at the top of the jib. I also removed one stainless steel locking link where the rear mast shrouds attach to the aka. This makes the mast tilt back slightly instead ot tilting forward as it did before.
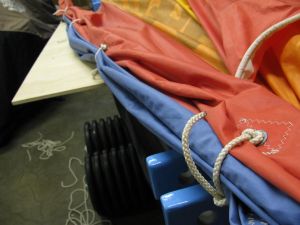
Added reefing ties for the main sail.
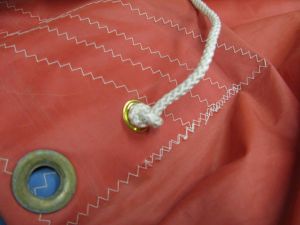
There were grommets installed for one set of reef points, but no grommets for reef ties were installed at the luff and leach. I added them.
The main reefed and the jib furled. Ready for high wind, wohoo!.

New drink holders at the rear of the cockpit. I once (gasp) actually spilled my beer because things got hectic and I had no place to set it down safely. I thought about making them, but these are actually made of pretty sturdy plastic. Less than $2 each at your local auto parts store!
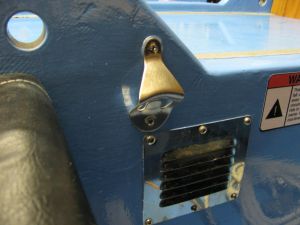
The bottle opener got moved to the front of the cockpit. Better that the crew open bottles rather than the captain.
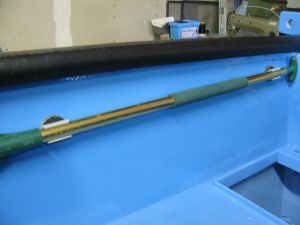
Paddles are attached to clips made from plastic conduit on each side of the cockpit wall. They're out of the way there, but in a handy location. The clips previously were tight up against the cockpit wall, and the wall curves a bit. This made the paddles pop out of the clips once in a while.
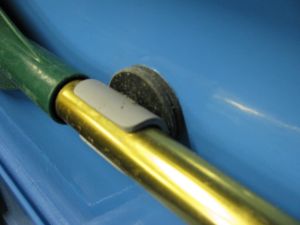
I made standoffs for the clips by drilling disks out of a sheet of plastic with a hole saw. They stay in the clips perfectly now.
Continue