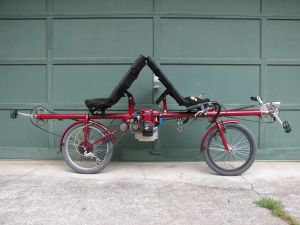
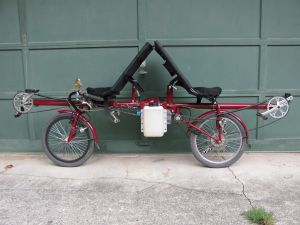
Motor side view.
This is attempt number two at building a back to back tandem recumbent bicycle, but this time with a motor. My first attempt wasn't very successful, mainly due to chain management issues, which are often difficult with recumbents. I would judge this bike as a success, very much so in fact. It's very comfortable, pretty easy to ride, and fairly efficient with its 110 psi Maxxis tires. The motor is loads of fun and is great on steep hills. The frame splits in two for easy transport in the back of pickup trucks, and no tools are needed take apart or reassemble the frame. Like any back to back, tandem recumbent bicycle, the stoker gets a pretty weird and sometimes scary ride. It's strange to see the world disappear from view as your main view, and not be able to see forward when you're hurtling down hills at 35 mph. You must trust the pilot, completely (heh heh).
Motor side view.
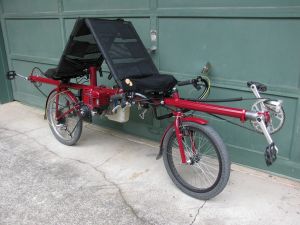
Motor side view from front.
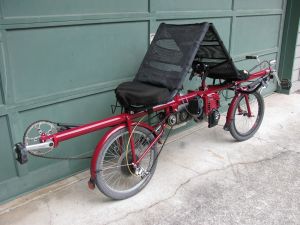
Motor side view from rear.
End of front boom showing telescoping adjustment (bare metal tube is the part that slides into the main frame tube, and is secured with a quick release seatpost bolt. Also shows tabs for generator headlight and white reflector mounts. The plastic tube over the chain protects the rider from getting oil on their pants or legs when getting on and off.
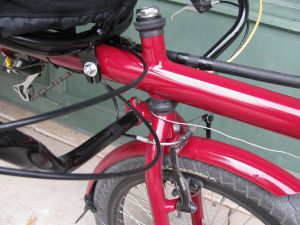
Close up of head tube-main tube junction. Inner tube scraps make for a "sealed" headset. A cut off steel handlebar stem was brazed onto the back of the fork steerer tube, so the handlebars attach directly to the fork. A small tube was inserted into a hole through the main tube and brazed, and serves as the mount for the front seat frame tabs. Steering is very neutral. I went for a 72-ish head angle vs. the 73 degree angle that was on the BMX bike the fork came from.
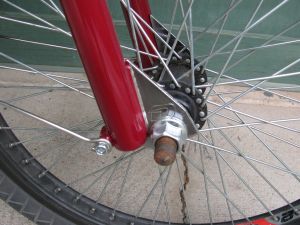
A chrome plated BMX fork was used, with the dropouts masked off when painting (chromed dropouts now). Also brazed some fender/rack eyelets on to the back of the fork tube ends. Note the heavy duty axle. The front wheel has 48 spokes with a super beefy, wide rim.

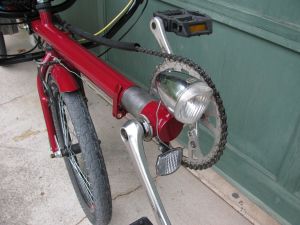
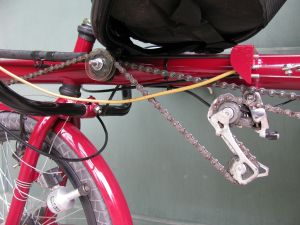
The motor and drivetrain. This is a Honda GX 35 35cc, 4 stroke engine, rated at 1.5 HP. The gear reducer is from Staton Inc.. It's a bit heavy, but really well built and very quiet and efficient. I like this set up a lot because the weight of the motor and gear reducer is low, they're very sturdily mounted, the motor drive chain is easily adjusted by sliding the gear reducer back and forth in the engine mount slots, and the drive chain is nice and short. Gearing is easy to adjust by swapping different size cogs or BMX freewheels. The jackshaft is a 5/8" keyed steel shaft with special adapters from Staton Inc. to mount the freewheels on the shaft. Because freewheels are used, riders can pedal independently from each other or the motor, or not pedal at all. The motor can be used with or without pedaling.
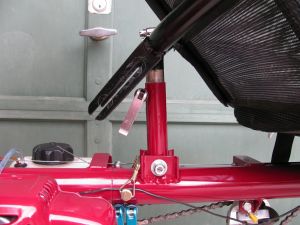
A close up of the front seat reclining adjustment. The red, vertical tube tilts back and forth, and the chrome tube sleeved down into it telescopes to allow the seat to tilt forward or back. A quick release seatpost bolt tightens the tubes to fix the recline angle in place. The seat frame and cover are from the now defunct Vision recumbent bike factory. They goofed on the design for the slotted tangs that come out the back of the seat frame. The tangs should have been curved to allow for the arc of the seat to pivot, so the slotted tangs are useless. The back seat frame has arc'd tangs, and they work well.
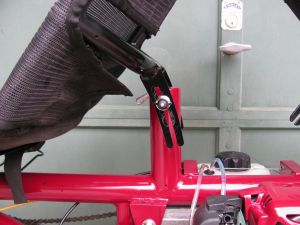
The rear set reclining mechanism. It's simpler than the front due to its arc'd, slotted tangs. A quick release skewer from a front wheel locks the recline angle.
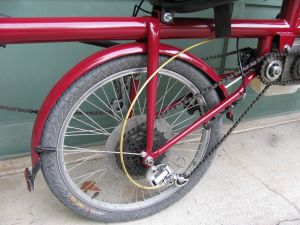
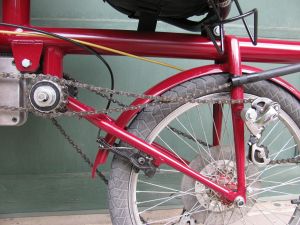
Rear wheel and final drive. This uses a five speed, 14-34 tooth freewheel (old school). I plan to upgrade to indexed shifting with a seven or eight speed freewheel at some point, mainly because axles on cassette cogs don't bend as easily as old style freewheel hubs. Those are Planet Bike polycarbonate fenders. Rear dropouts from Nova Cycles. The vertical struts are seat stays from a cheap mountain bike, mitered and brazed to the main tube.

Right side of handlebar showing brake lever (outer lever), throttle (inner lever made from BMX brake lever), and the engine cutoff switch. The engine can be easily started while you're riding. No need to stop. Just reach behind, adjust the choke and prime by pumping the primer bulb if cold, then pull. Two pulls for a cold start, one when warm. I plan to make a new seat cover for the torn front seat shown in this picture.
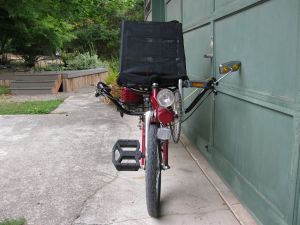
Front view.
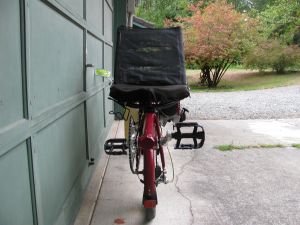
Rear view.
Gas tank side view.
A close up of the front end chain tensioning system. Chain tensioners are needed since the front and rear booms slide forward and backwards to allow the cranks to adjust for leg length. Chain management is typically one of the harder problems to solve with a recumbent, and with this bike it was doubly (ha ha) so. Actually quadruply so since there are four chains in all. I always try to avoid using drive side idlers since they steal efficiency, and I was able to do that with this bike. Had to use one idler for the front chain below the seat though.
Rear end chain tensioner system. Note how the chain is routed in a figure eight to allow the rear rider to pedal normally, yet move the bike forward. You can also see the rear rider's water bottle cage in this picture, clamped to the underside of the seat frame.
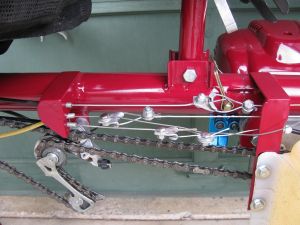
The frame splits in two for easy transport, so I had to think of a way to allow the cables routed to the rear of the bike quick release when the frame splits. Centerpull brake cable yokes are used. They look complicated and scary, and they are a pain to adjust initially, but they work well. Plenty of adjustability with all those barrel sleeve adjusters. The top is for the rear brake, middle for the rear derailleur, bottom for the throttle. Two (blue) quick release seatpost bolts are used as pinch bolts for the split frame. Then there's a big pin that safeguards the two sides from twisting or coming apart. If you look closely you can also see a small, sheet metal fin brazed on to visually align the main tube halfs so the pin can be inserted easily.
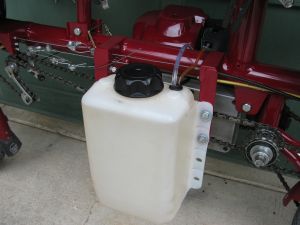
I can't remember the company that I bought the fuel tank from, but it's very well made and fairly inexpensive. Capacity is 3/4 gallons, which for one rider while motoring alone should last about 125 miles. Don't know about two riders yet, and will have to do some tests. I rode down to the local Chevron station yesterday to fill up. Got a few looks from others, naturally. $2.40 to fill up. The weight of the engine vs. the tank on either side balances out pretty well. There's no perception of the bike being off balance.
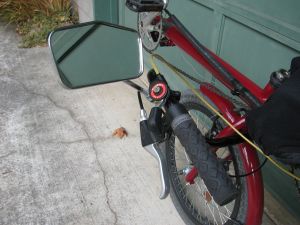
Left side of the handle bars, showing the front brake lever, the gear lever, and my nifty, retro rear view mirror.