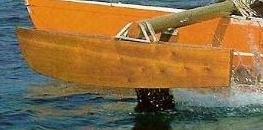
From the 1976 prototype, plywood, simple "V" shape. Very low volume
Jim's home | Trimaran home | This boat's home
OK, so here's my thinking with the amas. I am indeed basing my amas' design on the protypes and on more recent versions of the Hydroptere's amas. Here are examples of prototypes and more recent versions:
From the 1976 prototype, plywood, simple "V" shape. Very low volume
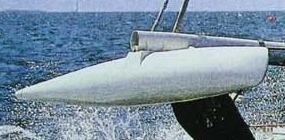
From the 1991 prototype. Also very low volume.
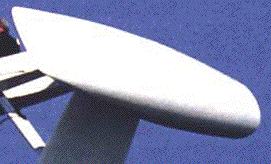
A more recent design.

And here's the most recent design.
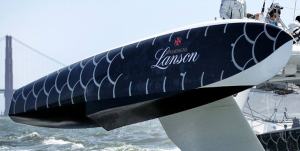
Another view.
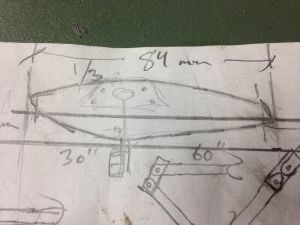
My crude sketch showing my ama design.
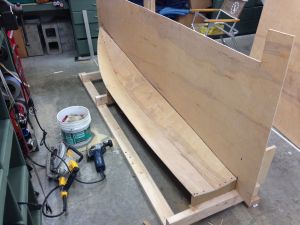
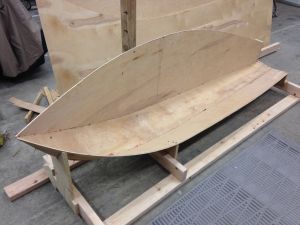
I made small scale mockups of the bottom 2 panels with paper card stock first. Then it was time to make full scale mockups using floor underlayment plywood. Here are the "V" panels stitched together and screwed to a strongback, with a piece of plywood positioned on the side for tracing with a Sharpie, and doing a rough design.
Another view.
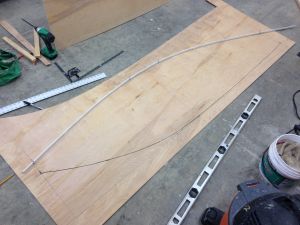
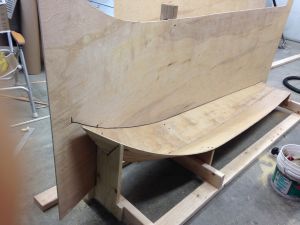
Here's a side panel with the bottom curve traced with a sharpie. The top edge is being faired with a strip of cheapo trim from Home Depot, bent to the approximate shape of the sketch shown at the top of the page.
Side panel stitched to bottom panels.
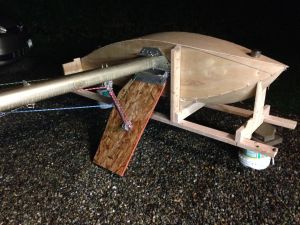
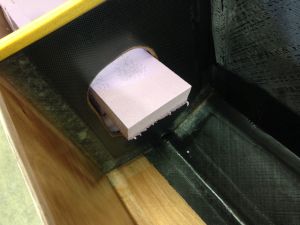
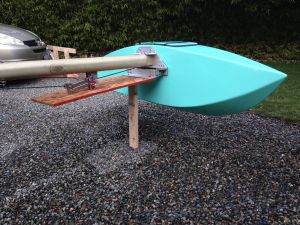
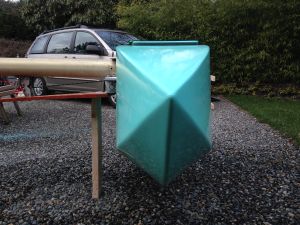
A prototype ama stitched together and positioned next to the end of the aka on a dark, wet cold night. My friend Paul did a very rough estimation of the flotation of this hull based on one cubic foot of air floating 66 pounds. He estimated the flotation of this shape (minus the weight of the ama) at 750 pounds! Might be overkill, but I like it.
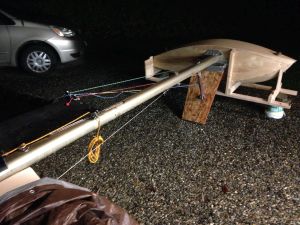
Another view.
Another view.
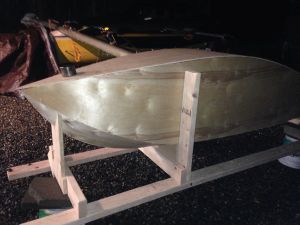
Another view.
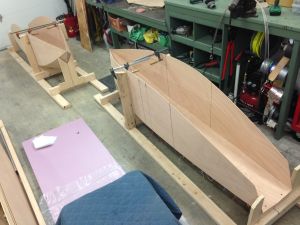
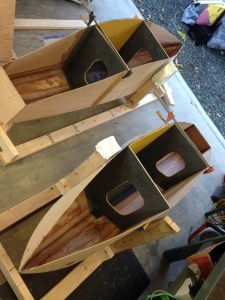
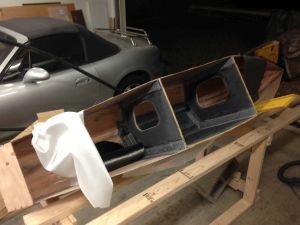
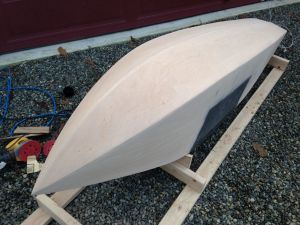
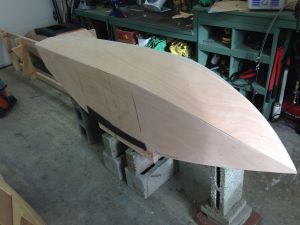
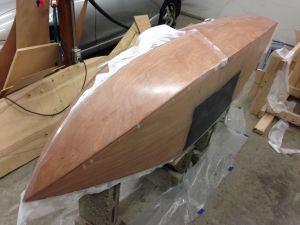
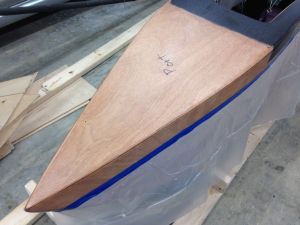
Here's the real stuff, 3 mil Okume marine plywood jigged in place after tracing from the prototype panels and cutting them out.
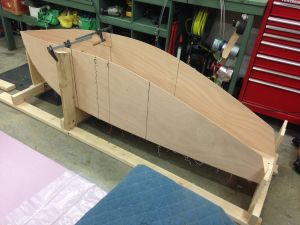
Another view.
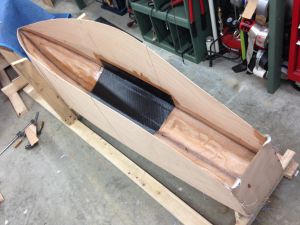
The amas will bolt onto the aluminum plates mounted at the ends of the aka. There will be all kinds of stress on the mounting surfaces of the amas, both from above and below depending on what terrible things are happening at sea. So, we begin with some doube ply carbon fiber here.
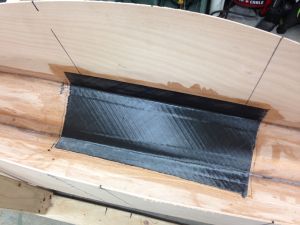
Another view of the carbon.
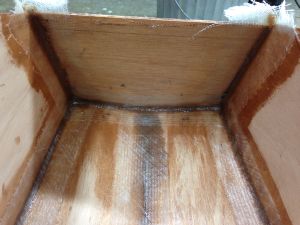
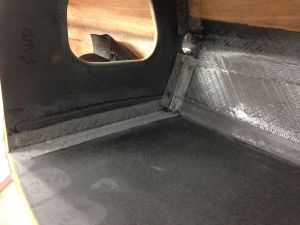
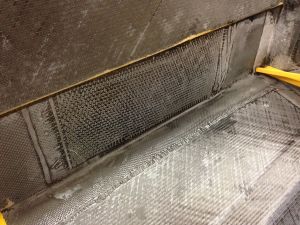
This is typical stitch and glue construction, with thickened epoxy fillets (wood flour for thickening in this case), with double ply fiberglass on top. The plys have fiberglass strands running at 45 degree angles, so both weaves span the joint. Good stuff. This is a view of the transom from inside.
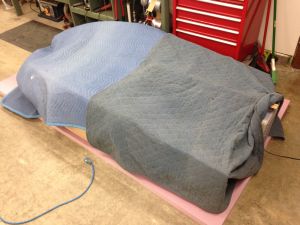
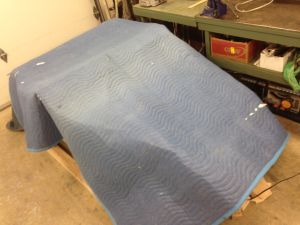
My shop is insulated and has a heater, but tenting and applying heat with a little space heater makes the cure complete more quickly. Moving blanket used for tenting here.
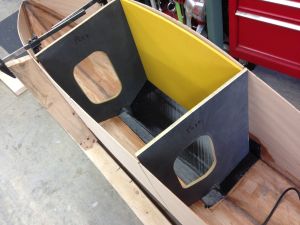
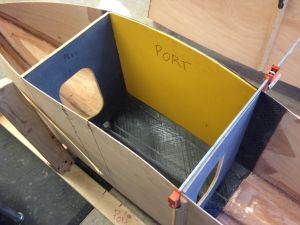
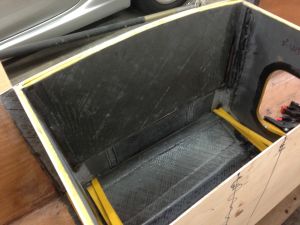
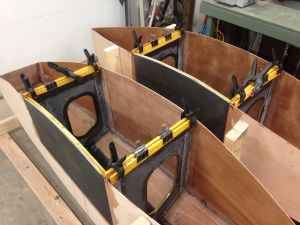
Here are the 2 bulkheads made from laminates of plain weave carbon, divynicell, 3 mil Okume plywood, and then more plain weave carbon. They're cut out for weight reduction, with the holes offset so there's more bulkhead material towards the side that mounts to the aka. Then there's a piece of divynicell (the yellow stuff) on the side to start the buildup for the mounting surface where it connects to the aka.
Bulkheads being laminated in after laminating the divynicell to the sides with double ply carbon.
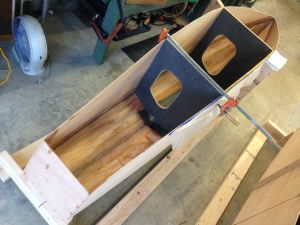
Bulkheads being laminated in.
Bulkheads being laminated in. Note the double ply carbon laminated all the way up the sides, below the divynicell.
Bulkheads being laminated in.
Tenting and heat for the cure.
Bulkheads laminated in with double ply fiberglass tape.
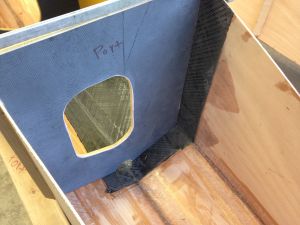
Closeup showing fiberglass tape securing bulkheads to sides and bottom of ama.

Another closeup.
The mounting surface, now with 2 layers of dinynicell and multiple layers of carbon.
I ran uni-directional carbon up the side for extra stiffness. This makes 3 types of carbon: plain weave, double ply and uni-directional.
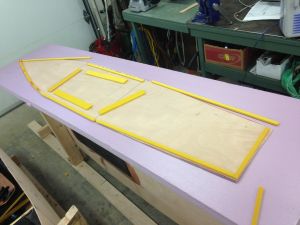
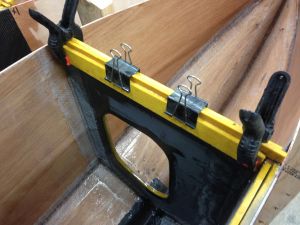
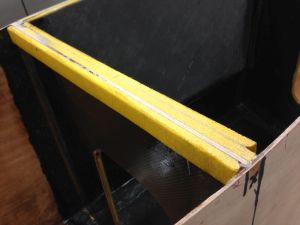
Constructing the tops. I'm putting strips of divinycell around the edge so the tops fit down into the sides and have an edge for thickened epoxy.
Epoxy spread onto the tops with the divynicell strips epoxied in place.
Close up showing the strips secured temporarily with push pins.
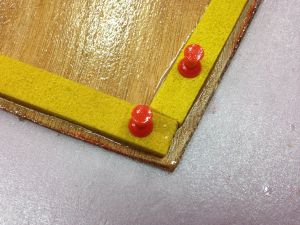
A close up.
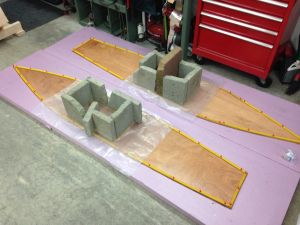
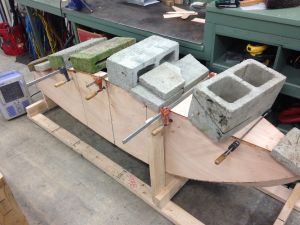
A view from above, showing chunks of concrete blocks holding down divynicell strips around the edges of where the holes for hatches will go. Polyethelene sheeting laid over the tops so the blocks won't stick to anything.
Strips of divynicell being epoxied in place here to form surfaces for the ama tops to be epoxied to.
Another view.
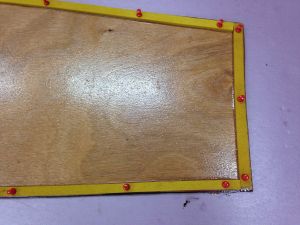
A close up of this mounting surface after sanding it flat.
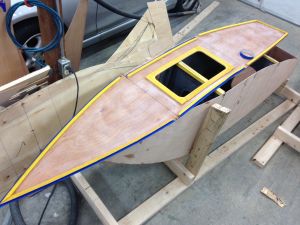
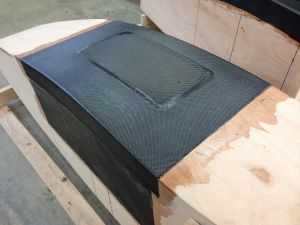
A completed top, masked off for applying polyurethane for waterproofing.
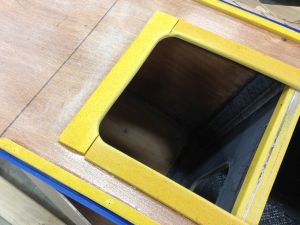
Close up showing divynicell strips around the edge of the hatch hole.
The completed tops coated with polyurethane.
The tops being epoxied on. Like clamps, you can never have too many concrete blocks for this kind of work.
Time to cure. Tenting and heat again.
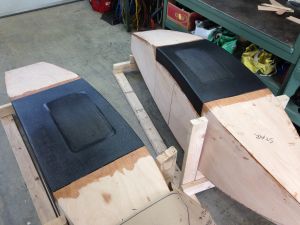
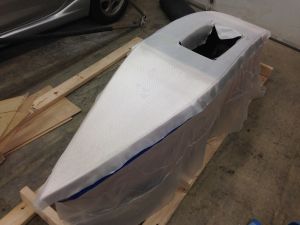
Tops on, with some more plain weave carbon for reinforcement.
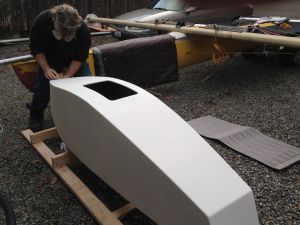
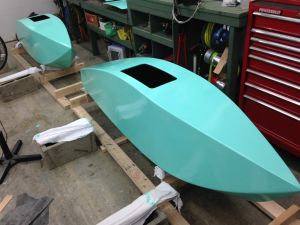
A close up showing where the hatch holes will be.
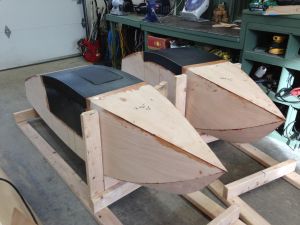
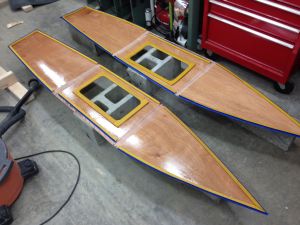
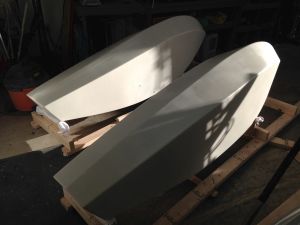
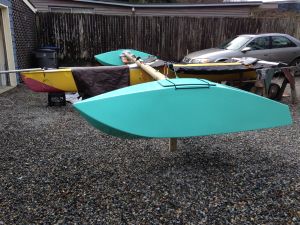
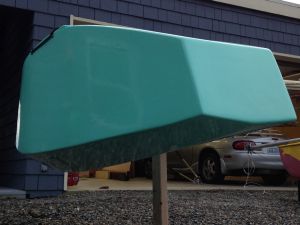
The amas.
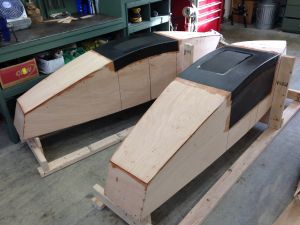
The amas.
I actually removed all this insulation eventually in the interest of saving weight. But for historical reasons, here's what I did.
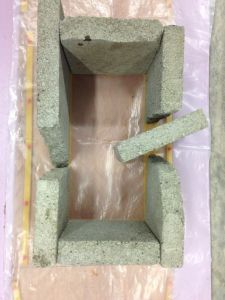
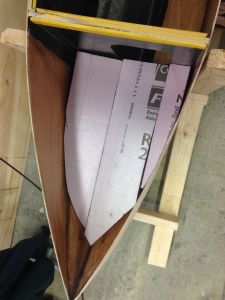
I cut pieces so they can be removed through the bulkhead cutout holes if needed. Each piece fits in a particular location, so putting them all back if ever removed would be challenging. Here's a view of an ama stern partly filled.
More foam in the stern.
A piece of foam sticking through the bulkhead cutout, in case I ever want to remove the foam.
Filling the bow section.
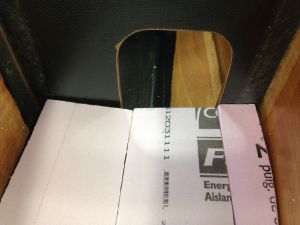
A view showing how the pieces are cut to fit out through the bulkhead cutouts.

More foam in the bow.
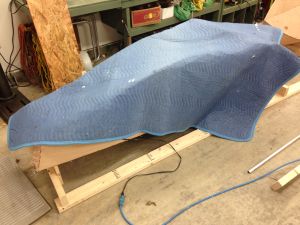
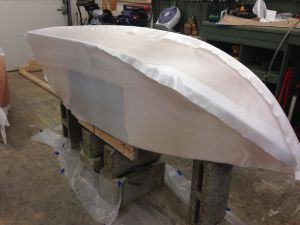
I'm using a lighweight E-glass for covering the amas, with multiple layers on the bottom and on the chines. I tried using peel ply over the glass when it cured. Peel ply doesn't stretch, so it can't be used over compound curves. So, I had to cut various panels of peel ply, which ended up being difficult to remove. It makes a nice finish though, and I intend to use it on simpler shapes in the future, like my foils.
A word on safety...
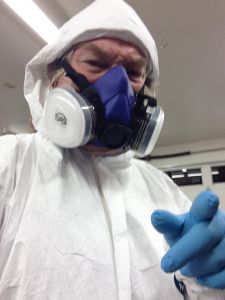
I've become a believer in protecting yourself when using epoxy. For little jobs not so much, but when laminating entire hulls yes. I always wear nitrile gloves and inspect them from from time to time while laminating. I have a whole box of Tyvek suits for my home inspecting job, so I use one on the bigger jobs. I bought the organic vapor respirator shown here for only $18 at NAPA. Haven't found any recommendations from the manufacturer on how many uses you're supposed to get out of it. But I store it outdoors in fresh air, and have used it a handful of times. I don't notice the fumes when I'm wearing it, but when I take it off they can be intense.
An ama sanded with 60 grit and ready for laminating. I try to do major sanding like this outdoors to keep the dust level down in my shop.
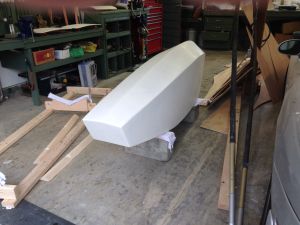
An ama perched on a makeshift stand made from concrete blocks and 2x4s.
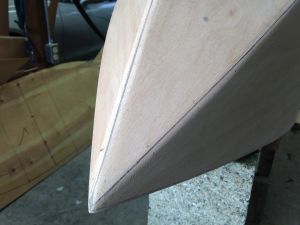
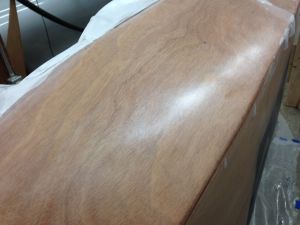
Close up showing sanded chines.
E-glass cut to fit plywood panels, and overlapped over chines.
I could get away with simply draping the glass over the tops and sides of the back section of the amas. But because of the curved shapes the glass wouldn't drape flat over the front, curved sections. So I had to cut and overlap glass sections.
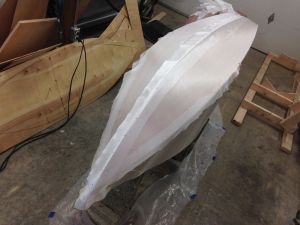
Epoxy applied and peel ply squeegied onto the glass.
Close up showing the peel ply on the glass.
After removing peel ply and sanding the sides and bottom, the amas were flipped over to laminate glass onto the tops.
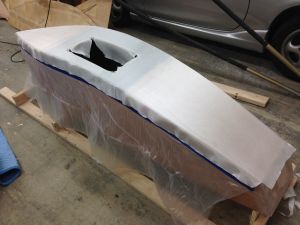
The sides are masked off to prevent epoxy from dripping down them.
I didn't peel ply the tops, so this shows the glass laminated over the tops.
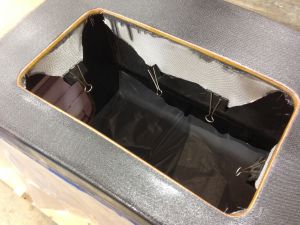
Glass wrapped over the edge of the plywood/divynicell sandwich at the hatch openings. The metal clips help pull the glass down to form a good wrap over the wood. I wanted to make sure the edges of the plywood were laminated with glass.
I've used Interlux Brightside paint for boats in the past. This time I thought I'd try Jamestown Distributor's TotalBoat Wet Edge Topside Paint and the primer that they recommend for it. After using it, I think it's pretty comparable and cheaper. I'd use it again at this point. We'll see how well it holds up.
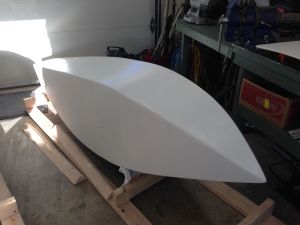
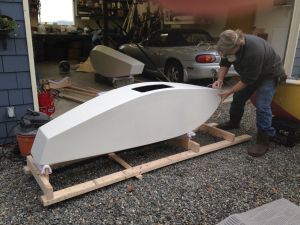
A primed ama.

Another view.
Two coats of primer here, ready for final sanding.

The hatch tops primed. I didn't show these in the ama build page, but they're made of curved divynicell with 2 layers of glass on the tops and bottoms.
Final sanding with 150 grit. Photo credit for my lovely wife.
Sanding outdoors to keep dust out of my shop.
Second coat of primer sanded and ready for paint.
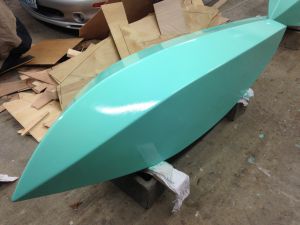
This is TotalBoat's "Sea foam" color paint. I can't remember if this shot shows one or 2 coats. I did sand with 150 grit between coats, and it looks nice and shiny after the second coat.
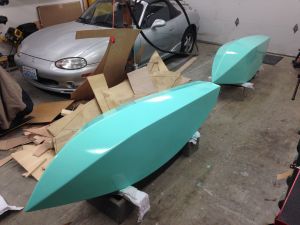
Both amas.
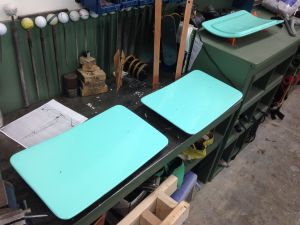
Hatch covers painted.
Painting each ama required letting them dry, rotating them, then painting the other side, then drying.
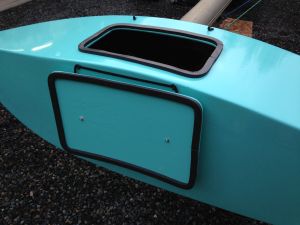
The hatches are installed with nylon p-clips and hooks, and marine grade 1/4" shock cord. The weatherstripping around the hatch and hole edges is from Chesapeake Light Craft. I've used this hatch design before. The 2 layers of weatherstrip form a baffle that's very waterproof, even in crazy conditions and sitting in the rain at a marina for years.

Here's what the hatches looke like when closed. I had left over nylon balls for shock cord that were green and red, so used them on the port and starboard sides to make it easier to pull the shock cord out of the hooks. I'm sure they'll help me remember what side of the boat I'm on.
Close up showing clips and shock cord.
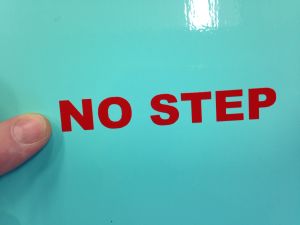
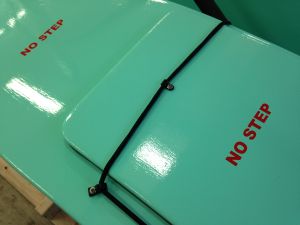
The amas are not built to be walked on. I want to make sure no one does, so I ordered these stickers.
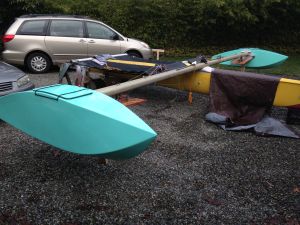
The amas mounted on the aka. They're super sturdy when bolted on. Very little movement when trying to change the pitch. No lateral/yaw or roll movement at all when trying to move them. The multiple layers of carbon and divynicell at the mounting points seem to be adequate. We'll see though.
My last trimaran was named "Best Guess" because every design decision I made was exactly that. Same for things like the ama mounting height and angle of attack. Here's my best guess.
Side view.
From the front.
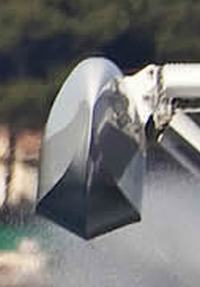
Like the real Hydroptere's.
The tail.
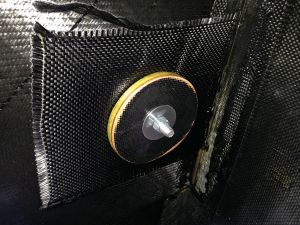
I made big washers out of left over bulkhead panel material. There's carbon fiber on both sides plus divinycell and okume plywood. They should spread the load nicely around the mounting bolts. I made individual round washers for the lower mounting bolts. Then a single, oblong washer for the upper mounting bolts (see below).
The mounting bolt holes and the holes for the hatches' p-clips and hooks are all done in the following waterproof way that won't allow rot. First mark the hole location, then drill a small pilot hole. Then drill an oversized hole that's bigger than the bolt that will be used. Fill the hole with thickened epoxy. Cure, then drill the correct-sized hole for the mounting bolt in the epoxy. That way no wood or glass is exposed in the holes.
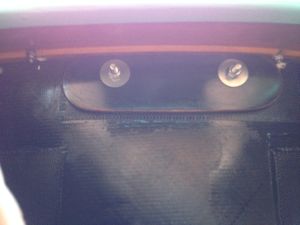
The upper mounting bolts use a single oblong shaped washer to spread the load. Those are temporary nuts. The real ones will by stainless steel nylock nuts.