
Jim's home | Trimaran home | This boat's home
I didn't have formal plans for the foils. They're 7'-6" long, 22" wide at the widest point, and 7" wide at the tips. I did some lift calculations with an estimated weight of the boat with my goal for them to foil at low speeds, and this is what I've come up with. One advantage of surface piercing foils is that they self-adjust by simply moving deeper or shallower in the water. I looked at all kinds of NACA profiles and am ending up with flat bottomed foils with a curved upper surface approximating a NACA 0012 profile with the thickest section of the foil being a third of the way back from the front. The airfoil myth is a good read. It's one of the reasons why I didn't try to use a foil profile like this one:
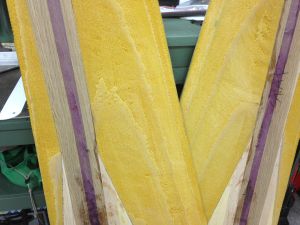
I'm using Okume plywood as skins for the foils, with white oak and purple heart wood for stringers that extend the length of the foils. Layers of divinycell and uni-directional carbon fiber will fill in the voids between the skins. Purple heart wood will be used at the leading edge (it's very hard) for impact resistance. Various layers of uni-directional carbon fiber will be used both inside and outside of the bottom panel's skin. Kevlar is very strong in tension, and uni-directional is very strong in both tension and compression. Lots of uni-directional carbon fiber will be used inside and outside of the top panel skin. Then the whole foil will be wrapped in at least one layer of bi-directional carbon fiber for twist resistance. Two layers of E-glass will then be used over the whole thing for abrasion resistance.
Cloth and epoxy
I'm sourcing my fabrics from a few different places based on price and what they have available. Soller Composites had a great deal on 24" wide uni-directional carbon fiber, so I bought lots. Applied Vehicle Composites had a great deal on biaxial carbon fiber, so I bought theirs. I bought plenty of stuff from Fiberglass Supply. They're located near me and I sometimes get deliveries the next day. I'll probably get my next batch of E-glass from them. I like Raka Inc's epoxy. It's a 2:1 ratio, so you don't have to be too fussy about measuring. Also, they make a non-blush hardener. I usually buy their 3 gallon kit.
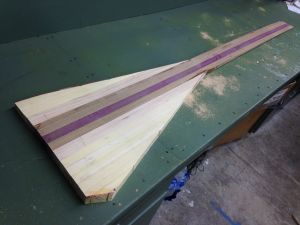
I decided to make a hardwood stringer assembly to better handle the point loads of the top mounting points on the foils, and where the folding struts mount on them 21" from the top.
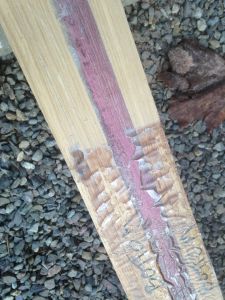
I like to shop for wood at Edensaw Woods in Port Townsend, WA. It's a nice 45 minute drive from my house. They have an incredible assortment of exotic woods to support the boat building/repair industry in Port Townsend and the Northwest. It's there that I learned about the The Janka Harness Test. The nice guy in the wood showroom (sorry, can't remember your name), recommended white oak for my stringers, and purple heart wood for the leading edges. So I bought a 2" slab of white oak and a 1" purple heart board along with 1 sheet of 3mm and 4mm okume plywood each. 4mm for the flat, bottom skin, and 3mm for the curved upper skin. I also bought some Alaskan yellow cedar for reinforcement around the mounting holes at the top of the foils.
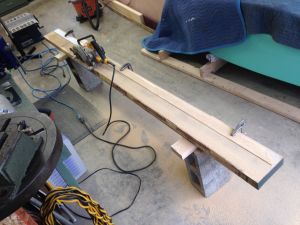
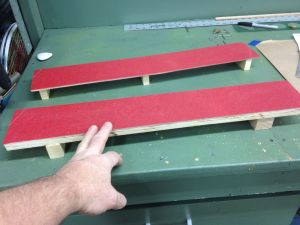
This picture shows cutting a straight edge on the rough slab of white oak. With the flat, straight edge, I then ripped it into strips about 1" thick.
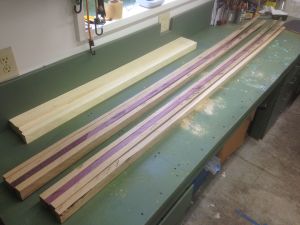
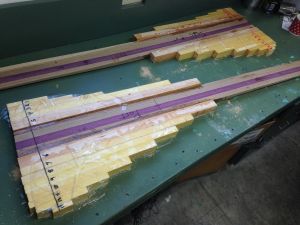
The stringers taper from 1 3/4" thick at the wide/top end down to 3/8" thick at the narrow bottom end. To cut the taper I clamped each strip to a straight 2x4 and drew a line at an angle. I ran each piece through my table saw with no fence, just eyeing it. This picture shows the stringer strips in the foreground, and strips of yellow cedar at the back of the bench. I had extra purple heart, so why not use it for this. One thing I found was that oak sure does curl if you rip a thin piece. The purple heard didn't. In retrospect I would have used only purple heart. But after laminating the strips together with epoxy, a lot of the curl disappeared. I think I can eliminate it with the various layers of other materials that will be epoxied to it.

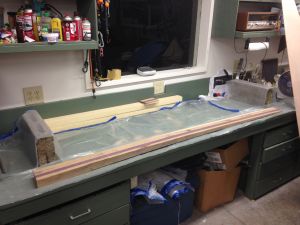
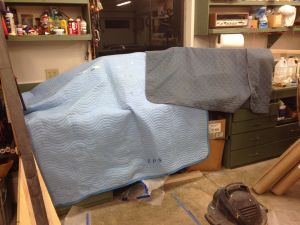
Here's my setup for laminating the stringer strips together. I tented the whole thing with blankets and used my electric heater with it for almost 24 hours before unclamping.
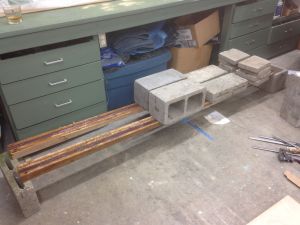
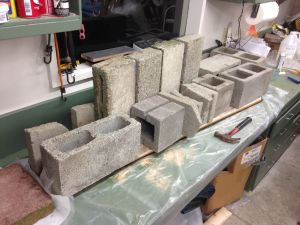
I put concrete blocks on the stringers in hopes of straightening them. This eventually did work.
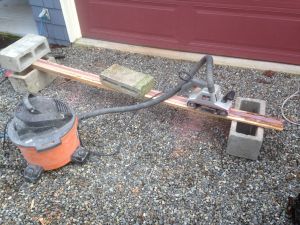
My setup for sanding off the excess resin after laminating the strips together.
A close up showing the sanded surface vs. the surface with the epoxy that needed to be sanded off. After doing some calculations on how thick the foils would be based on my desired NACA profile, I realized the stringers needed to be thinner and shorter.
Concrete blocks set up to bend the stringers to straightness while laminating on some carbon fiber.
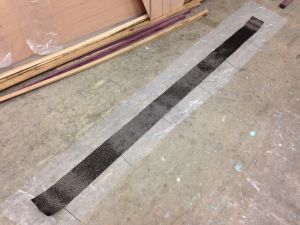
I lay out plastic sheeting on the floor to saturate the uni-directional carbon fiber before laminating it on to the stringers. That stuff really soaks up the resin.
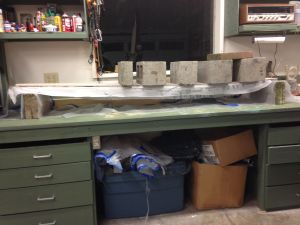
Here's my attempt at straigtening out the warped stringers while the epoxy/uni-directional carbon fiber layup cures. I actually corrected it too far, so the stringers bent the other way!

Tenting with moving blankets and a heater to cure the layup.
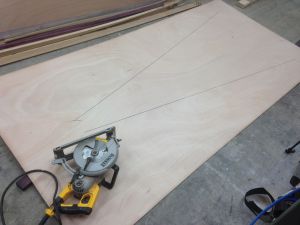
Cutting the 4 mil Okume plywood bottom panels for the foils.
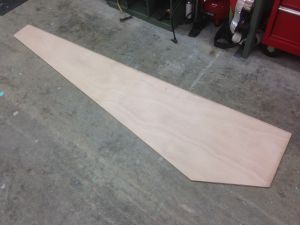
A cut panel.

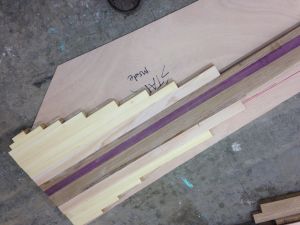
Here's a stringer cut to the correct length and tapered to the right thickness. I'm assembling blocks of Alaskan yellow cedar and some Douglas Fir to form the reinforcement at the tops of the foils where they bolt on to the brackets at the ends of the aka.
The reinforcement blocks after epoxying them together.
This same assembly after sanding down to a uniform thickness, and laying on the bottom Okume 4 mil plywood panel.
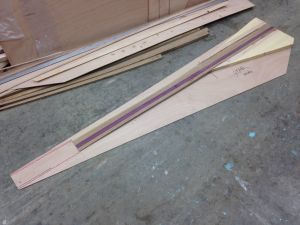
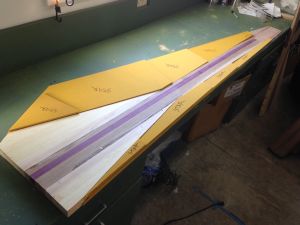
The final stringer assembly cut to shape. Looks like a giant solid body electric balalika.
The foils are a sandwich construction of the following on both the top and bottom surfaces, working from the outside in:
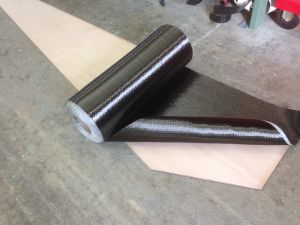
I bought 110' feet of this 24" wide uni-directional carbon fiber. It's pretty amazing stuff. Really thick. This picture shows laying out the cloth before cutting it to shape.
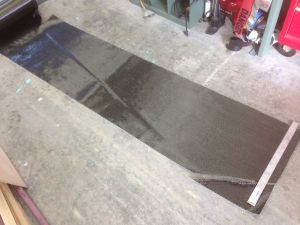
The cloth rolled flat, ready to cut.
Here's how the stringers will fit on the bottom panels.
The orange-yellow pieces are divynicell, used to infill the space between the plywood skins. It's pretty high density stuff, yet easily shaped.
This layup is the plywood bottom panel, plus the uni-directional carbon fiber, with the stringer assembly, and the bottom 2 layers of divynicell infill. Everything weighted down with concrete blocks.
Tenting and heat again. This dramatically decreases the cure time with my slow-cure Raka epoxy.

Laminating on the remaining layers of divynicell infill pieces.
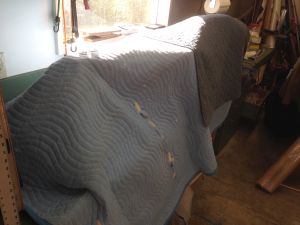
Tenting again. My electric bill suffers from this. Oh well.
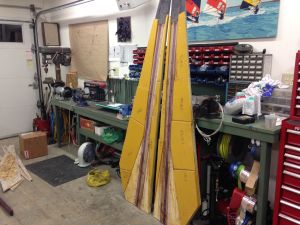
And there they are! Ready to shape with a belt sander and hand sanding gear.
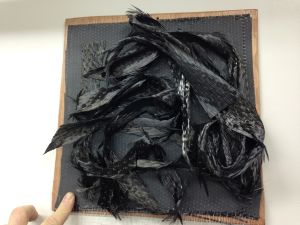
I was an art major in college. When I did a test layup of 2 layers of uni-directional carbon fiber on a piece of Okume plywood, it struck me as textile art. So I crumpled up some scrap carbon fiber on the test layup and voila, art. Finger shown for scale.
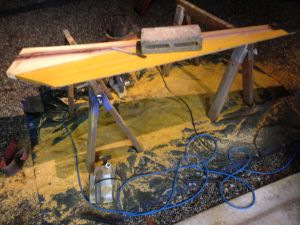
Rough shaping the foils outdoors for dust control. First I tried using a belt sander with 50 grit to knock the divynicell down to the layer of the stringers. Divynicell is actually pretty tough to sand. The belt overheated and fell apart. So I brought out my trusty electric planer, and that worked great. Then hand work with a Sureform and a coarse rasp. I was planning on having the foil profile printed at various scales at my local print shop, and glueing those prints to plywood to make templates. I didn't, and instead just winged it. Looks good so far.
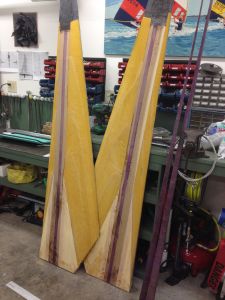
Here they are rough-shaped with the purple heart leading edge wood to the right. The purple heart will get glued to the front edges and protect the foils from impacts.
A close up showing the layers of divynicell.
Next step is to hand sand them with these spiffy sanding blocks I made. The one in the foreground is stiff, for sanding down the length of the foils. The other is made of 3 mil okume plywood and is really flexible. Will use it to sand diagonally to shape the foil camber.

Foil sanded and ready for plywood skin.

I applied thickened epoxy over each side of the foils and then spread it with a notched trowel. Then laid on the 3 and 4mm layers of marine plywood and clamped the plywood on by screwing on firring strips. This helps fair the shape of the foil before laminating.

Top side of a foil after epoxying on the plywood skin, and the first layer of unidirectional carbon on the flat bottom side.

The bottom side with the carbon.

I left an inch or so of carbon hanging off the trailing edge so I could fill the void at the edge with thickened epoxy. The thin trailing edge can be fragile, so best to make it out of composite rather than mostly wood.

Top sides of foils with uni carbon.

Close up showing the peel ply that will be peeled off, leaving a nice smooth but toothy surface.

Hydropter's main foils had winglets that pointed straight down when they were deployed (down). They act like little daggerboards. I did the same, using windsurfing fins.

They had to be positioned just so, so they're vertical when down, and so they're straight in the direction the boat will be going. Tricky.

Look familiar?

Bits of plain weave carbon used to reinforce their attachment point on the foil tips.

Fin beveled and foil tip sanded to form a tight joint.

Laminating on the winglet.

And the other. Both with peel ply.

Foils with winglets.

Getting ready to epoxy on the purple heart wood leading edges.

Close up of the built up construction at the root of the foil.

Epoxying on the purple heart leading edge.

Very carefully planing the purple heart leading edge.

Rough shaped by planing.

The rasped with a Sureform and sanding blocks.

Should survive a collision with something.

For laminating the final fiberglass layers I installed a pivot bolt at the root.

And then made a bracket that allowed me to position the foil in 3 positions.

Pivot bolt on bench.

First layer of glass draped over foil.

Wetted out fiberglass over carbon.

Epoxy fill coat before fairing.

I used Total Boat's 2-part fairing compound. Works good. Cures quickly, easy to sand. I spread it using large squeegies made out of strips of plastic cut from 5 gallon buckets.

Reality check.

Mounting bolt holes. Drilled oversized, filled with thickened epoxy, then drilled with the correct size bolt.

Filled holes ready for final drilling.

These will become anti-ventilation fences made from G-10 fiberglass panels. If you're not familiar with ventilation, it happens when very low pressure is on one side of a surface moving quickly through the water. Air can be sucked down from the surface and cause "ventilation", where a foil can loose all lift suddenly. Windsurfers call this "spin out", and it feels like your fin has broken off. So these little surfaces will break up the flow of bubbles from the surface coming down the top side of the foil, where the pressure is low.

Close up showing one positioned for epoxying.

Thickened epoxy.

Fairing compound now.

Primed. I used my spray gun to apply the primer.

Painted, with anti-ventilation fences in place.