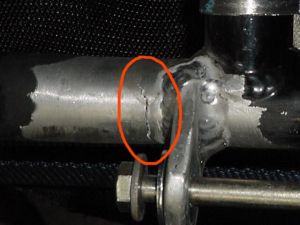
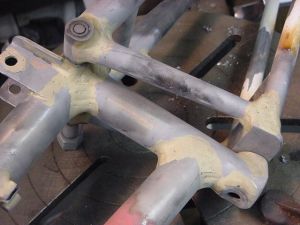
The crack where the lower tab was. This looked to be the worst.
Jim's home | HPV home | This bike's home
I'm afraid I've been slacking lately, both in working on the bike, and when I have, in posting pages to this site. Here's an attempt to catch up. On 3/17 I was lucky enough to get to go on the Advanced Transportation Products factory tour (where they make Vision recumbents) You can read about that here. Tony brought his Pharo bike which he'd recently converted to front wheel drive. I brought my sprung bent and we swapped for test rides. My friend Phil Smith also sold me a nice, older air compressor that he rebuilt, and he lent me his sandblasting equipment "semi-permanently".
After the factory tour and my sprung bent having been ridden around a bit, I came home and noticed CRACKS (!!!) in the seat frame where I had cut and filed off the mounting tabs that I didn't need, or needed to move. See below.
The crack where the lower tab was. This looked to be the worst.
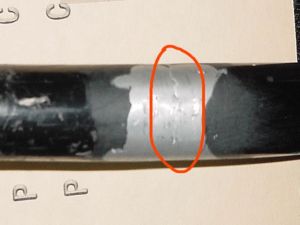
A crack where one of the upper tabs was, on the spreader bar between the seat rails. There was one on the other side too, where the other tab used to be.
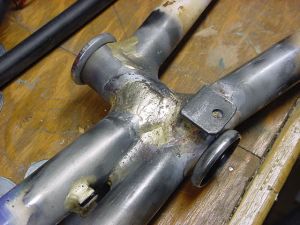
I contacted Ernie, my welder friend again and he seemed pretty busy, so I asked Michael Lampi, a human powered boat enthusiast who has a TIG welder, if he'd help me out. He was kind enough to say yes and laid down beads of aluminum over the cracks as seen below.
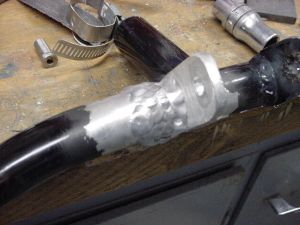
The bottom crack with Michael's beads.
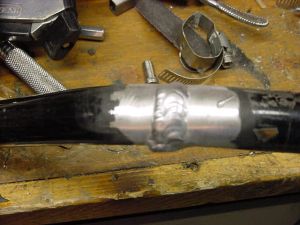
One of the upper cracks with a bead. We'll see how these repairs fair. I bought another seat frame at the ATP tour and could use that, this time not cutting the tabs all the way off, or filing down to the tubing.
After Phil dropped off the sandblaster I was itching to prep my frame for painting, so I made myself a poor man's sandblast booth by stapling up a tarp under the our deck in the shape of a booth, and weighting down the bottom edges with bricks. This actually worked pretty well. When the sand material was used up I just lifted the tarp up, since it covered the ground too, and poured the sand back into the container. Sandblasting with a homeowner's setup isn't particularly speedy, so I elected to sandblast only the joints and areas that would otherwise be difficult to clean for painting, like cable stop braze ons. I'll sand the tubes by hand. Here are some pictures of the sandblasted areas.
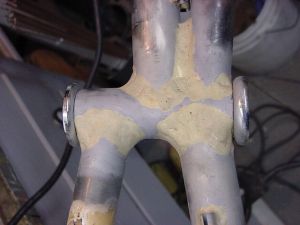
What this picture doesn't show is the other side of this joint. Sandblasting revealed that I was way light on the brass where one of the tubes met the head tube. You could actually see the edge of the mitered tube.
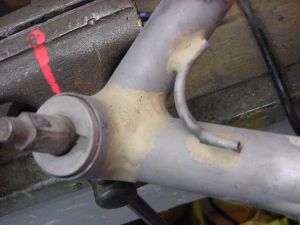
Tonight I finished the remaining brazing tasks on the frame. This will allow me to do the final sandblasting. After buying pulleys from ATP, I redid the front idler pulley mount for the second time, moving it closer to the frame. This applied plenty of heat to one side of the head tube, and when I sighted down the frame after this rework, I saw that the frame had bowed out of alignement by a good 3/8". I managed to bend it back into alignement using a long iron pipe, some blocks of wood and my pool table (as a weight), but found I'd corrected a tad too much, and the joint where I was light on brass formed a crack in the thin brass. This was a blessing in disguise, forcing me to add more brass to the weak joint, which in turn realigned the frame from the additional heat. So now the frame is straight, the joint is strong like it should be, and my idler pulley mount is aligned correctly.
The strengthened joint.
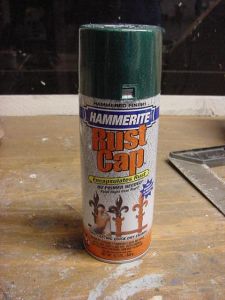
Lastly, I picked out my paint color. Hammered Metal dark green. I like Hammered Metal paint because it's very tough, and it has a texture so if you have ugly brazes (who me?) they're hidden pretty well. Plus the texture pattern is kind of neat.