Rear Swingarm Assembly - 1/20/2001
Rear Triangle Assembley - 1/22/2001
Suspension Mounting Surfaces - 1/24/2001
Assembling the Front Triangle - 1/26/2001
Final Geometry and Boom Tube Prep - 1/28/2001
Frontmost Triangle - 1/30/2001
Return Chain Idler - 2/5/2001
Seat Bracket - 2/7/2001
Seat Bracket Continued - 2/8/2001
Rear Seat Strut - 2/9/2001
Rear Seat Strut Bracket Reworked - 2/16/2001
More Rework - 2/18/2001
Making the Seat Cover - 2/25/2001
Hinged Handlebar Riser - 2/27/2001
Handlebar Riser and Bars - 3/1/2001
Handlebar End Rework - 3/3/2001
Cable Braze Ons, Final Assembly, TEST RIDE - 3/8/2001
Rerouting the Chain's Return Path - 3/15/2001
Cracks, Sandblasting and More - 3/27/2001
Paint - 4/4/2001
Final Assembly - 4/7/2001
Ready to Commute - 4/8/2001
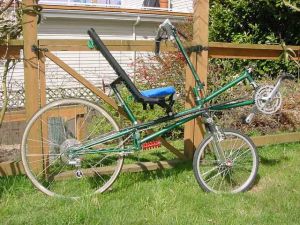
In January 2001 I began building a short wheelbase (SWB) recumbent with full suspension. This is my fifth homebuilt, including a back to back tandem. The back to back tandem was partly successful, but I realized I needed to make independent drivetrains for the front and rear wheels to solve a plethora of problems. Before launching into that I decided I wanted a single recumbent for commuting. Amazingly, a few days after I made this decision I received a catalog from The Hostel Shoppe that sells a good variety of bents. Suddenly I had lots of color photos to base my design on. I'm very familar with web resources for seeing production and home built recumbents, but having something printed out to take into my basement was handy. I've been collecting bike parts for most of my life, and some of my design decisions were based on parts that I have already. Recently I've discovered Recycled Cycles in Seattle, a place that sells vast quantities of used bike parts at great prices. And they're willing to bargain. I'm in heaven there. This discovery has loosend up my creative directions since I can get almost any part I need at a great price. They even have lots of big chainrings (56+ teeth).
One thing that separates this project from others I've done is having a digital camera. I bought my wife a Sony Mavica for Christmas, it uses floppy discs for media, and it makes it sooooo easy to bring the camera down in the basement, take pics, pop the floppy into my computer and copy them to my server. Thus the ongoing saga of this site.
The decision to build a sprung bent was cinched when I found a pair of Top Gun 20" suspension forks at my local shop, Aaron's Bike Repair in West Seattle, for only $49 brand new. They have about 1.5" of travel, which I know isn't as good as the Ballistic forks, but they're not "toy" forks built only for the appearance of suspension. They're actually really nicely made. So the question presented itself, how to spring the rear end. You'll see from other pages on this site the design I ended up with. I couldn't bring myself to buy a Cane Creek shock and special little pump. At the time of this writing I'm playing with either using a spring or elastomers. I know the advantes and disadvantages of each.
Anyway, I hope you enjoy this little story and the pictures that go along with it.
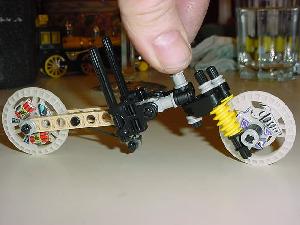
Click for video of prototype suspension action.
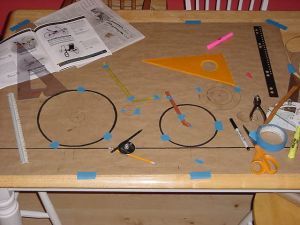
My plans. Note the catalog open to the page with the P-38 lightning.
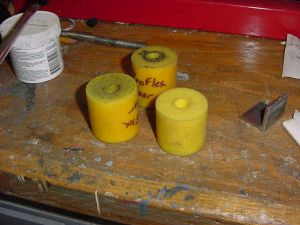
Elastomers I got from Recycled Cycles. Only a dollar for 4!